Alekhine Defense Krejcik Variation Krejcik Gambit

How to Play the Opening: Alekhine Defense: Krejcik Gambit Variation

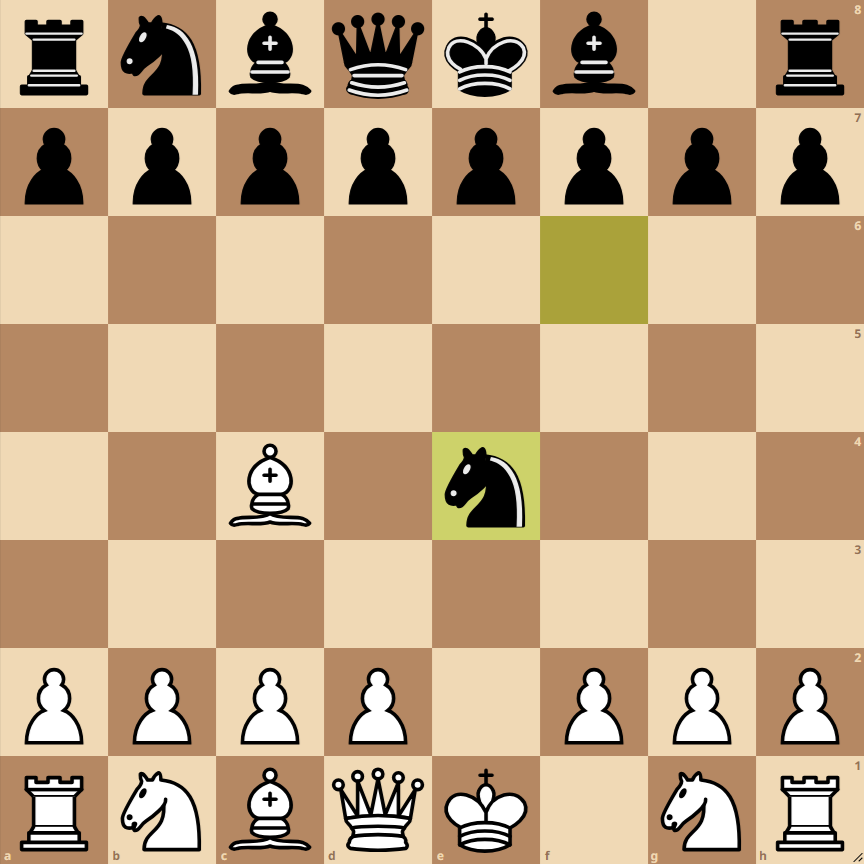
  • 1. e4: White starts with the move pawn to e4, controlling the center and preparing piece development.
  • 1… Nf6: Black responds with the knight to f6, attacking the e4 pawn and signaling the Alekhine Defense, aiming to provoke and weaken White’s pawn structure.
  • 2. Nc4: White develops the bishop to c4, indirectly threatening the weak f7 point in the black camp and preparing for a possible kingside castling.
  • 2… Nxe4: Black captures the e4 pawn, accepting the challenge and seeking to benefit from the central pawn.
  • 3. Bxf7+: White sacrifices the bishop on f7, a typical move in the Krejcik Gambit, aiming to unbalance the black king and gain an advantage in development and attack.

Opening Variations: Alekhine Defense: Krejcik Gambit Variation

1… d6

An alternative for Black is to play 1…d6, aiming to control the center without immediately committing the knight.

2… e5

After 2. Bc4, Black can choose 2…e5, strengthening the center and preparing the development of the bishop and queen.

3. d3

Instead of sacrificing the bishop with 3. Bxf7+, White can play 3. d3, aiming to recapture the pawn and maintain a solid structure.

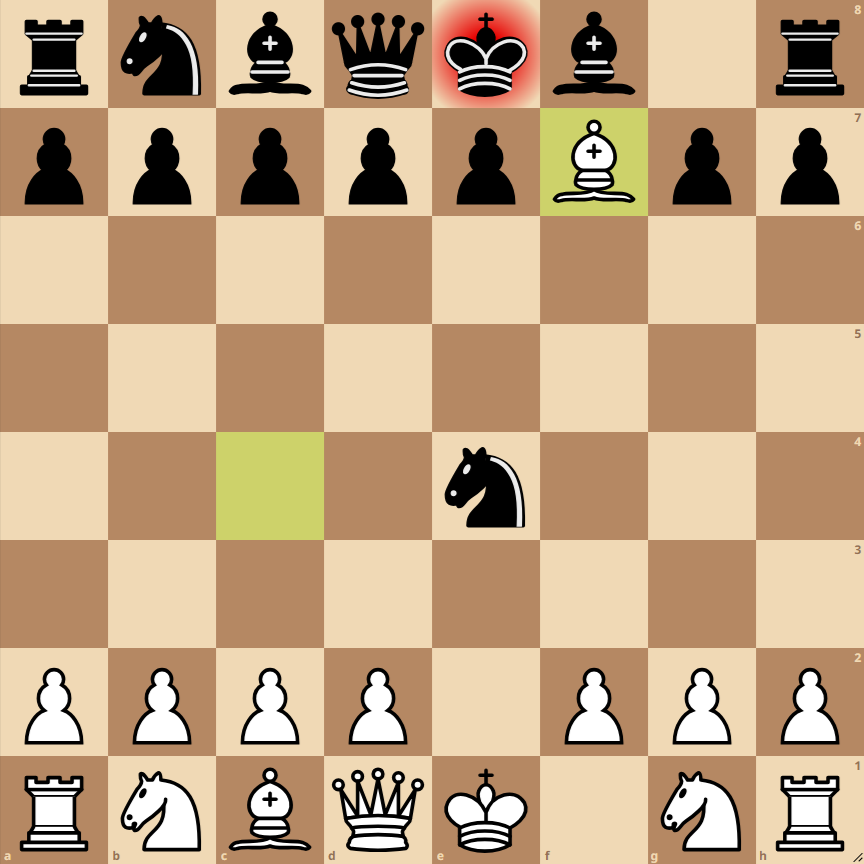
Opening: Alekhine Defense – Krejcik Variation – Krejcik Gambit

Initial Moves: 1. e4 Nf6 2. Bc4 Nxe4 3. Bxf7+

Current Position and Strategic Analysis

In this phase of the opening, White has opted for the aggressive Krejcik Gambit in the Alekhine Defense. The current position is characterized by bold play from White, sacrificing material to gain a development advantage and possibly launch an early attack against the Black king.

For White:

Strategy: White aims to destabilize the Black king’s castling and gain a development advantage. The bishop sacrifice on f7 is a common tactic to open lines and target the exposed Black king.

Next Tactics: After 3…Rxf7, White can continue with 4. Qh5+ g6 5. Qxh7, threatening checkmate and simultaneously attacking the bishop on e4. It is crucial for White to maintain pressure and exploit the exposed king.

Risks: This gambit involves significant risk as White loses a bishop in exchange for uncertain attacking opportunities. If the attack fails, White will be materially disadvantaged.

For Black:

Strategy: Black should focus on defense and harmonious piece development. Accepting the bishop sacrifice on f7 can be tempting but also exposes the king to attacks.

Next Tactics: If Black captures the bishop with 3…Rxf7, they must be prepared for a series of checks and pressure. It’s important to develop pieces like the c8 bishop and the queen to defend castling and counterattack.

Risks: Accepting the gambit entails a defensive game and the possibility of falling into White’s tactical preparations. It is vital not to neglect piece development while defending against the attack.

Conclusion and Recommendations

In this position, Black must weigh the pros and cons of accepting the sacrifice. On one hand, they gain material, but on the other, they face a powerful attack. For White, it is crucial to maintain the initiative and try to capitalize on the unprotected Black king. The key for both sides will be finding the balance between aggressive tactics and solid development strategy.